
Workflow Action: Add Task
The Add Task action automates the process of creating tasks for assigned users, ensuring efficient follow-up and organization. For instance, tagging a contact with "ultimate task" will automatically generate a task on the assigned user's contact page and notify both parties. This guide will walk you through setting up the Add Task action.
Step 1: Start a New Workflow
Begin by creating a new workflow or modifying an existing one.
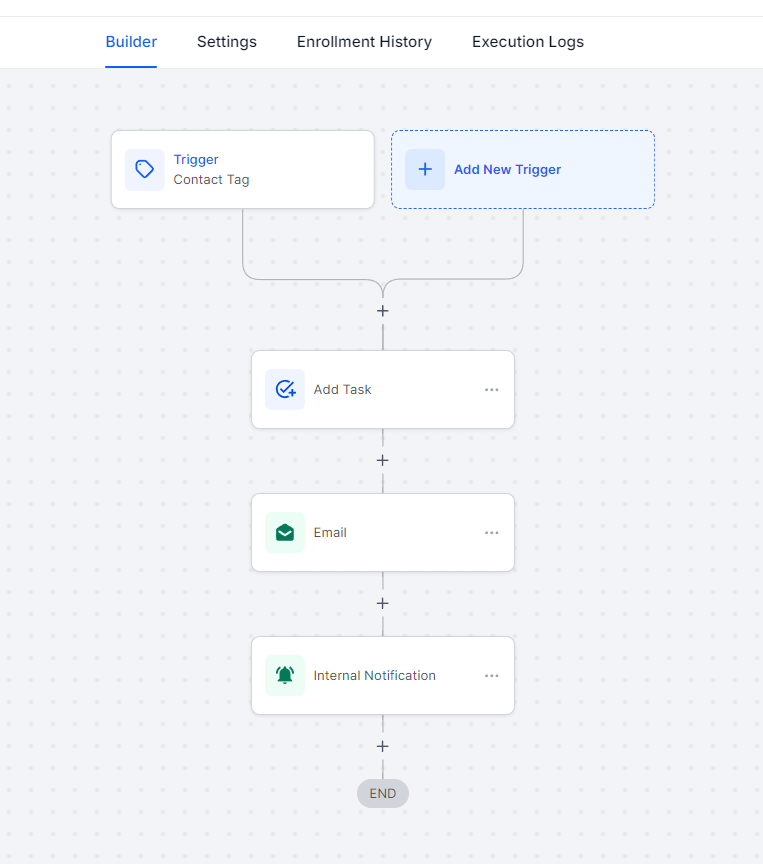
Step 2: Setting Up the Workflow Trigger
In the Workflow Triggers section, select “Contact Tag” under the Contact category.

Filter for a specific tag, which can be created from various areas within the system, including the contact area and settings.

Click “Save Trigger” at the bottom right of your screen.

Note: You can select any trigger, including opting for no trigger at all.
Step 3: Adding the Add Task Action
Click the “+” symbol below the trigger to add an action.

From the Actions menu, select “Add Task” or use the search function.

Optionally, name the workflow action, then:
Provide a title for the task.
Add details for the description.
Assign the task to a specific user.
Set a due date.
Save the action.
Step 4: Setting Up the Send Email Action
Click the “+” symbol below the Add Task action.
Select “Send Email” from the External Communications section.
Name the workflow action if desired, and fill in the necessary fields, including:
Subject (required)
Message (required)
Save the action.
Note: Subject and message are mandatory fields.
Step 5: Setting Up the Internal Notification Action
Select “Send Internal Notification” from the Actions menu.
Choose “Email” under Type of Notification.
Customize the notification settings, including selecting the user type (e.g., Assigned User).
Save the action.
Step 6: Customize to Your Preference
Feel free to add additional actions and tailor the workflow to fit your specific needs.
Finalizing the Workflow
Publish and save your workflow by clicking the “Publish” button in the top right corner of the screen.
Pro Tips
Test Your Workflow: Prior to deployment, test the workflow with sample data to ensure that task creation, email notifications, and internal communications function as intended.
Use Clear Naming Conventions: Clearly name your workflow actions for easier identification and management in the future.
Customize Notifications: Tailor the internal notification email content to provide clear instructions or relevant information to the assigned user, enhancing communication and task completion.
Review Workflow Triggers: Regularly evaluate and update your triggers and actions to stay aligned with any changes in your processes or requirements.
FAQ
How do I set up a trigger for adding a task?
Select “Contact Tag” from the Workflow Triggers Menu and filter for your desired tag. Save the trigger to activate the workflow when this tag is applied.
Can I use triggers other than “Contact Tag”?
Yes, any available trigger can be used based on your needs, including other contact-related triggers or no trigger at all.
How do I ensure the task is assigned to the correct user?
In the Add Task action setup, specifically assign the task to a user by selecting their name in the assignment field.
Are there any required fields for the “Send Email” action?
Yes, you must provide a subject and message content to successfully send an email as part of your workflow.