Adding the Review Widget to Your Funnel or Website
If you want to showcase reviews that your leads have left about your business, follow these steps to add the Review Widget to your funnel or website.
Part 1: Customizing Your Review Widget
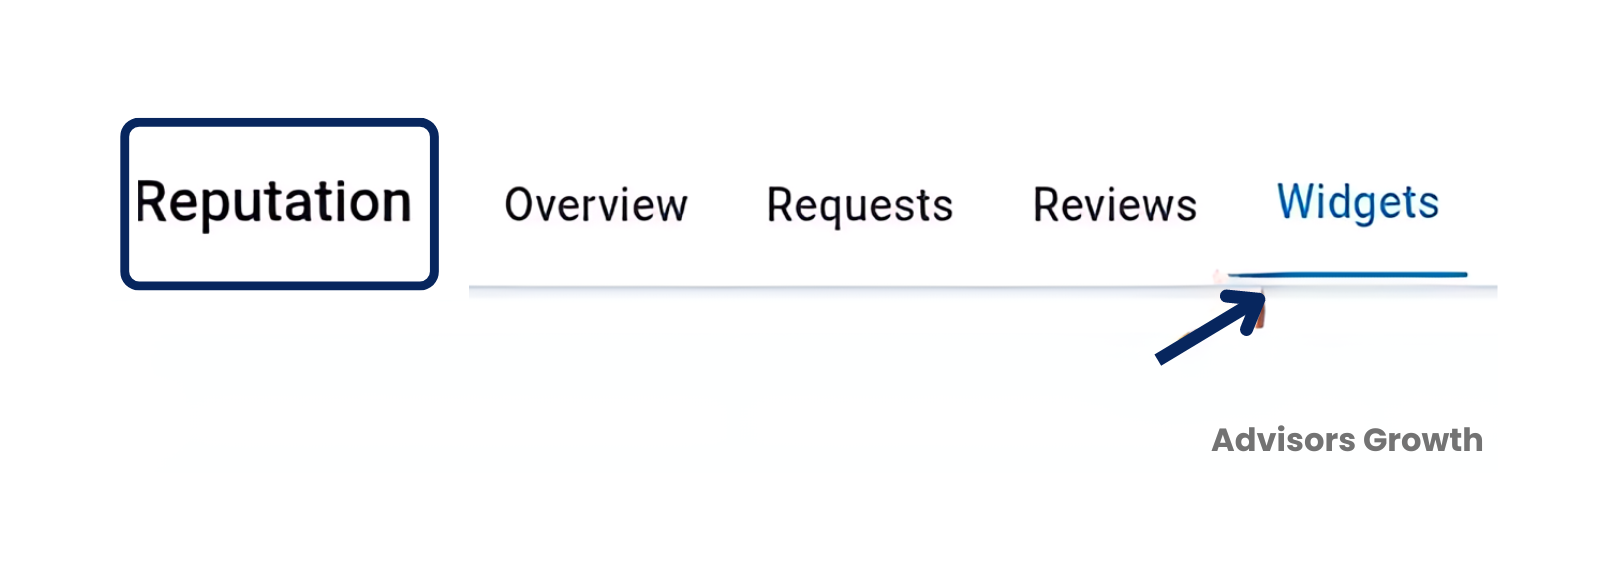
Navigate to Reputation: On the left side menu, go to Reputation, then to Widgets.
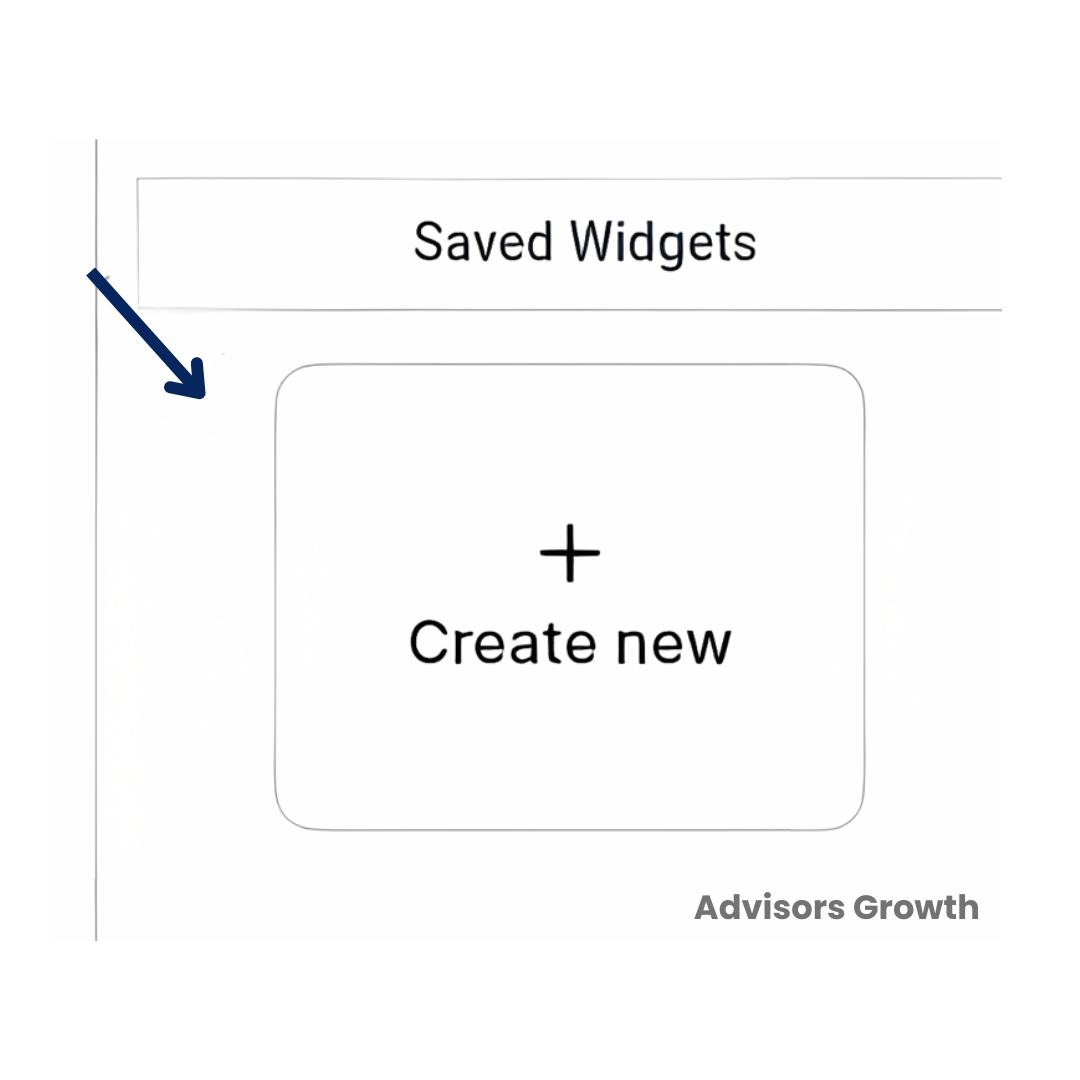
Create or Select a Widget: On the right side, you'll see a panel to create a new widget or select one from the templates (this feature will be available soon). Click on "Create New" to create the widget.

Customize the Widget:
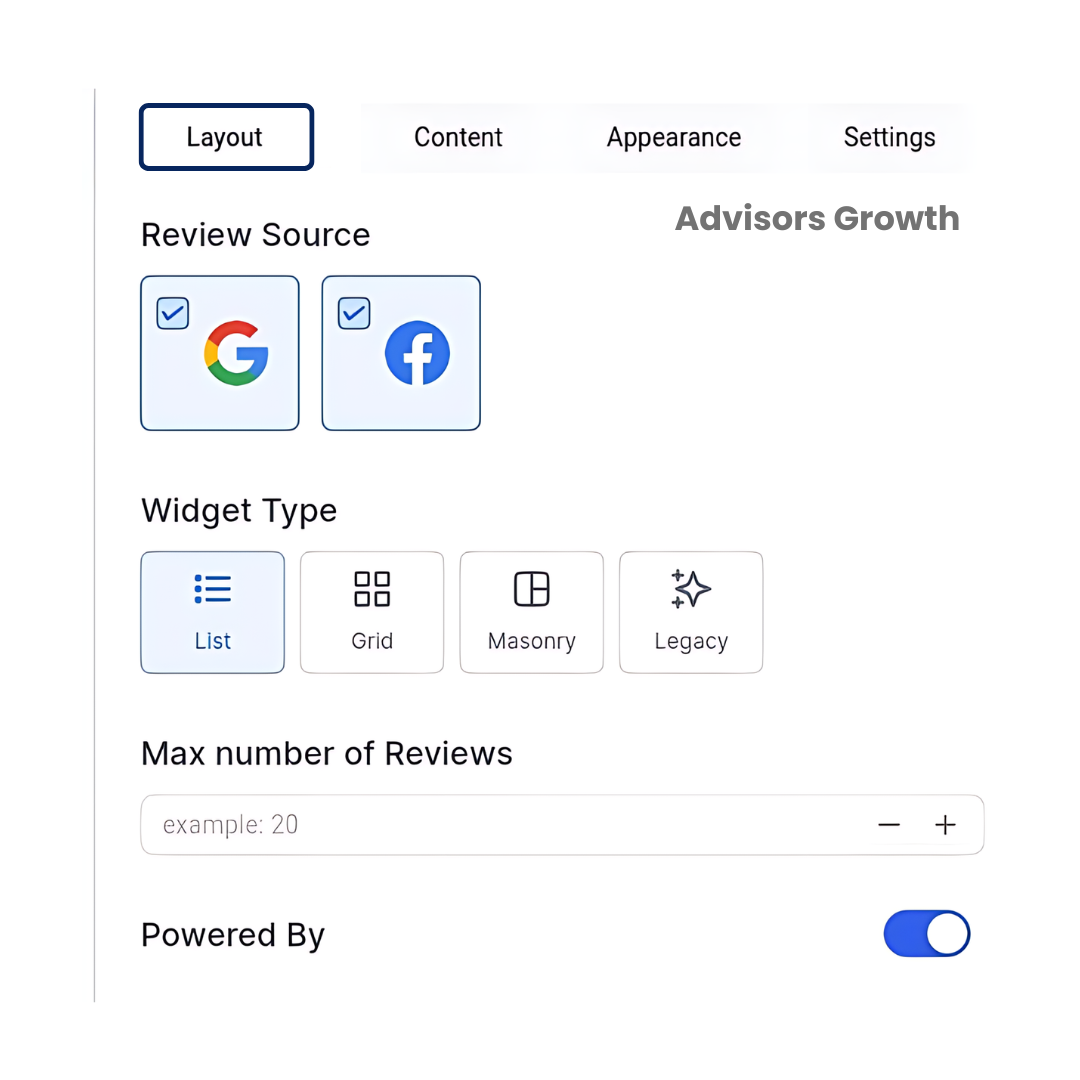
Layout: Choose the widget type you prefer, select the source of your reviews (Google My Business or Facebook), define the maximum number of reviews to show, and toggle the "Powered by" message on or off.
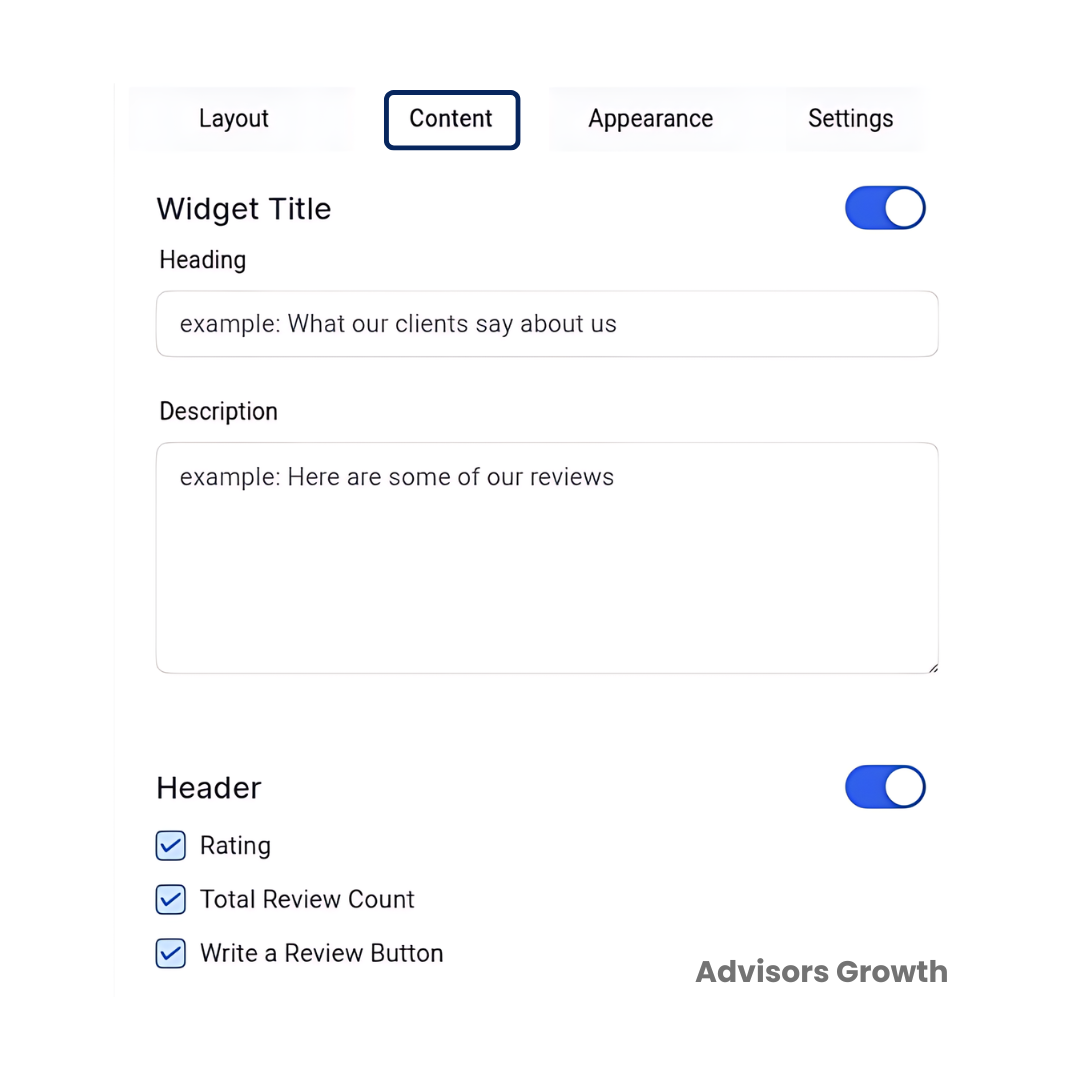
Content: Add a title and description for the widget. In the header section, enable or disable the rating, total review count, and the "Write a review" button.
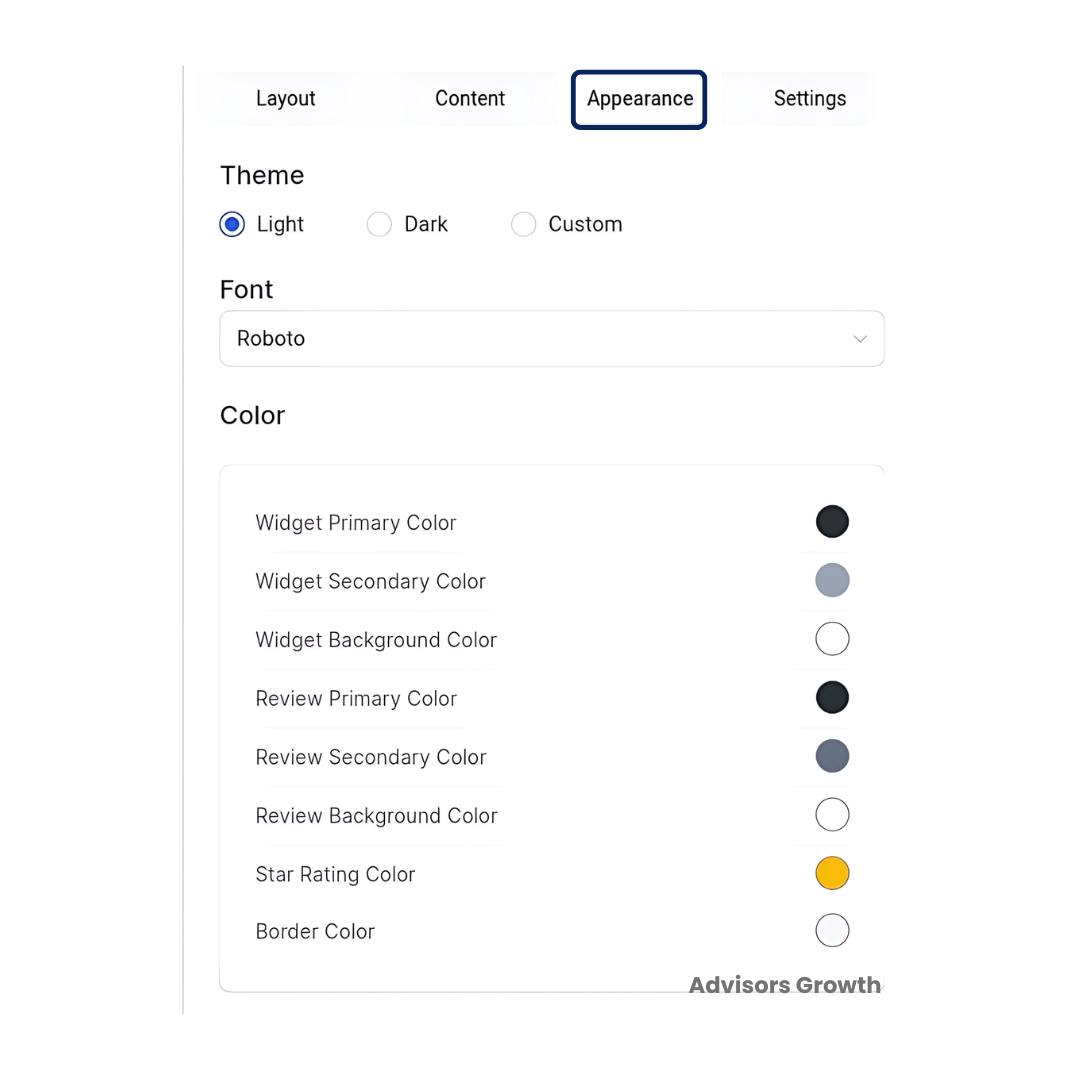
Appearance: Choose from Light, Dark, or Custom themes. If you select Custom, you can personalize the heading, reviews, stars, and background colors.
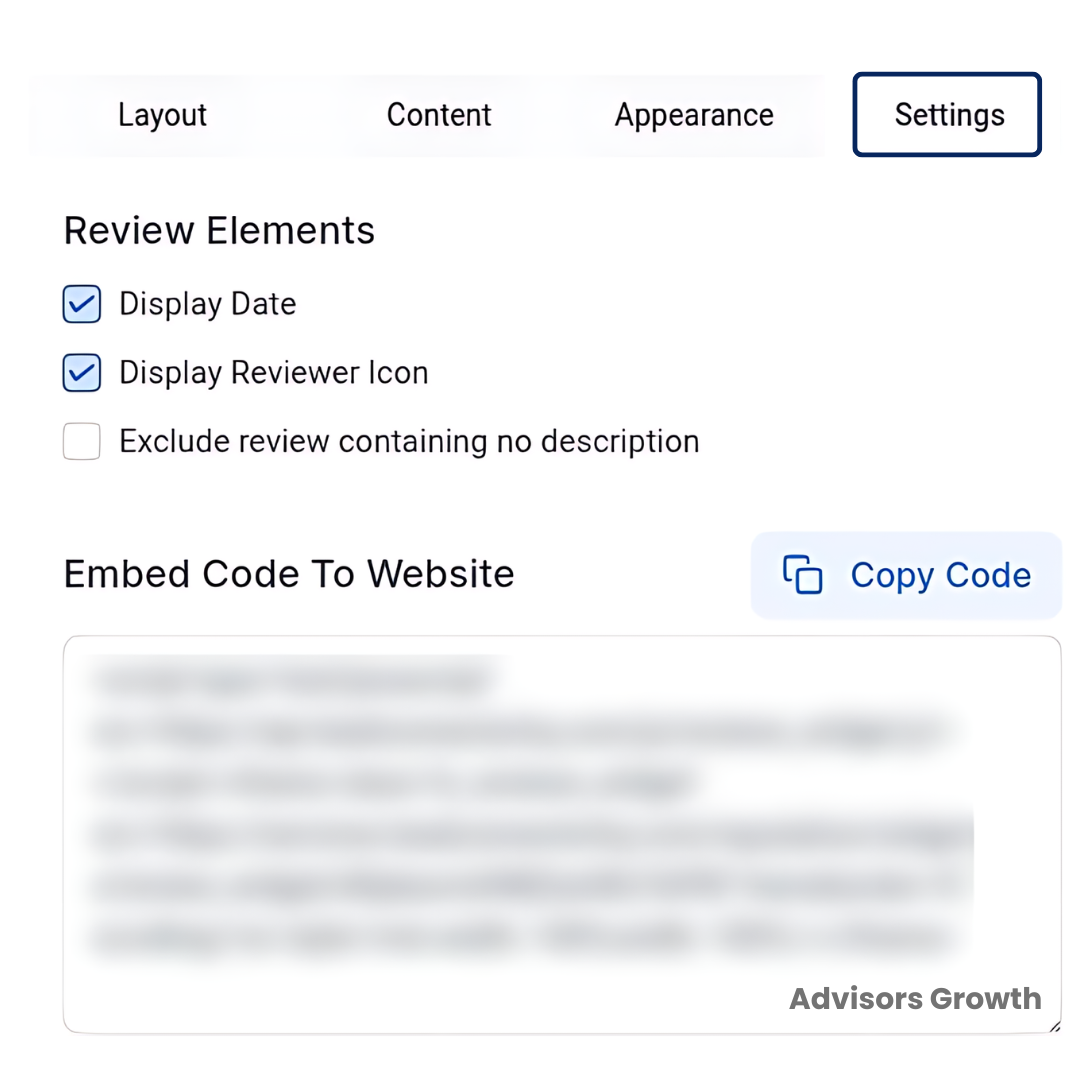
Settings: Enable or disable the review date and icon, and exclude reviews without descriptions. Generate the embed code for your website, copy it, and paste it into the HTML element on your website.
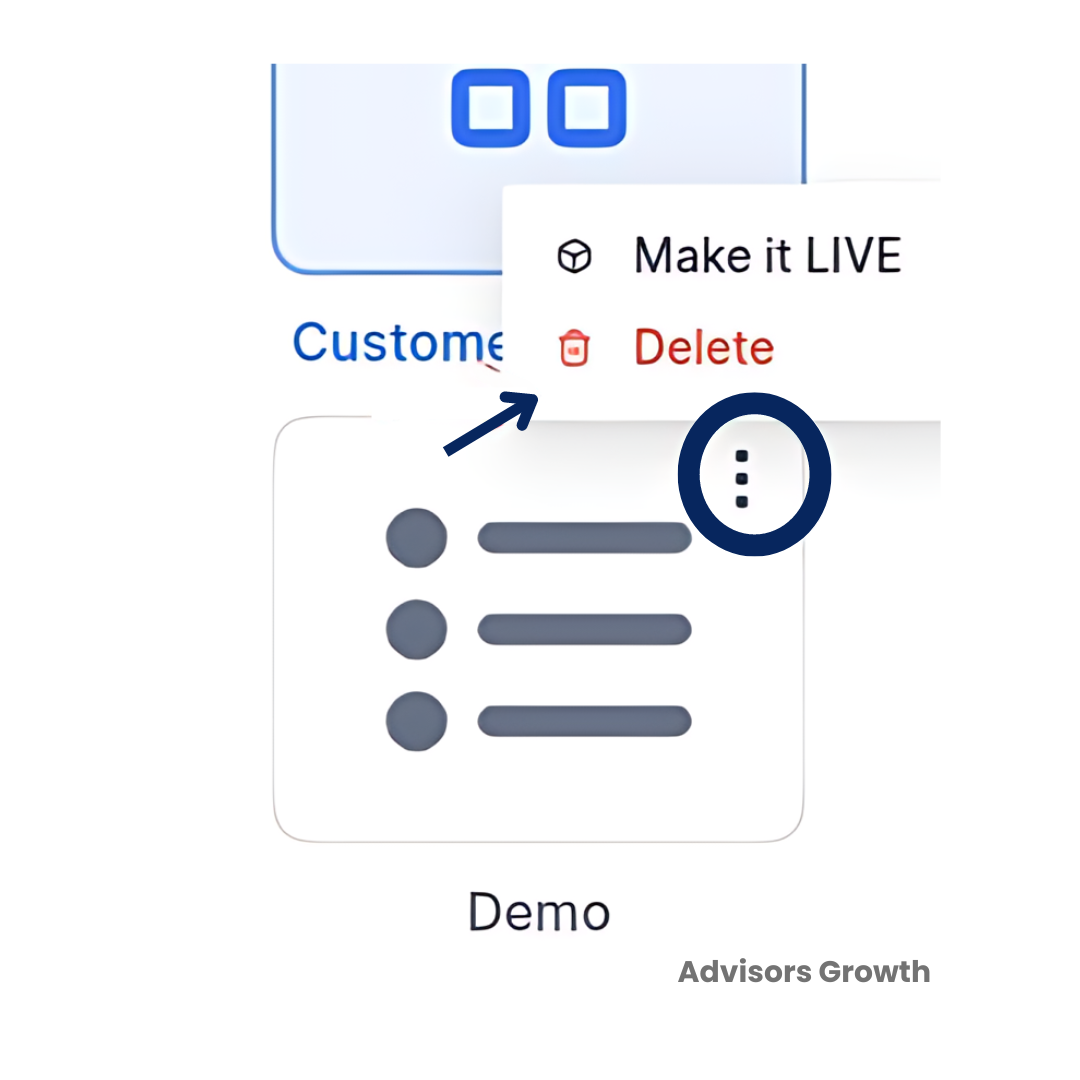
Save the Widget: Give your widget a name for reference. You can also delete widgets you no longer need by clicking the triple-dot menu at the widget's upper corner.
Part 2: Adding the Widget to Your Funnel or Website
For this example, we'll add the widget to a Funnel, but the process is the same for both.
Access the Page Editor: Navigate to the Funnel or Website page editor for the site where you want to add the widget.
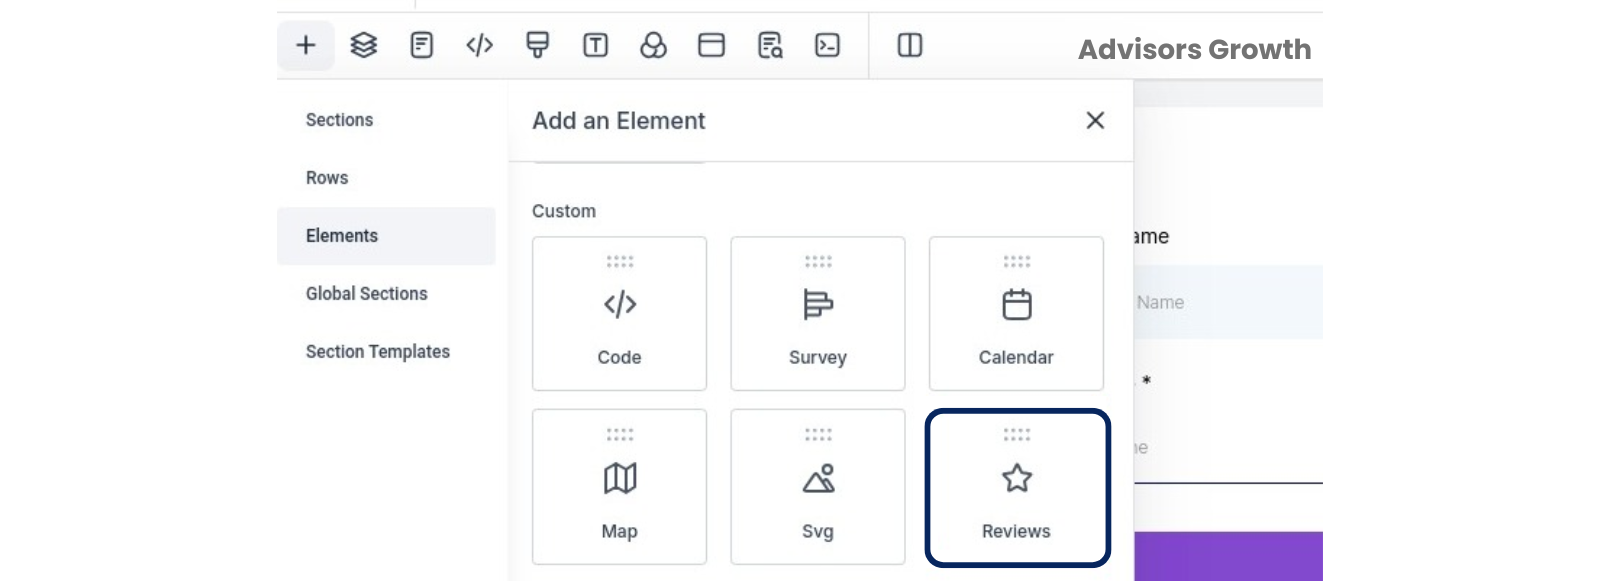
Add a New Section: Add a new section, row, and column, then select the "+" sign.
Add the Review Element: Scroll down to the Custom elements, then click, drag, and drop the Review element.
Save: Save your changes.