
Custom Fonts in the Site Builder
Follow these steps to customize the fonts in your funnel or website using various methods.
Default Custom Fonts in Advisor's Growth
Access the Site Builder: Navigate to Sites and edit the desired page.
Add Sections, Rows, and Elements: Customize your page by adding sections, rows, and elements to your preference.
Modify Text: Click on an element to highlight it and modify the text using the menu at the top.
Typography Settings: Navigate to the “Settings” button at the top of the builder and click into Typography.

Choose Fonts: Select the native Headline and Content fonts that will be used throughout the funnel. You can also modify the text typography for specific elements by choosing a font family or a Google Font.
Custom Fonts in the Site Builder Using CSS
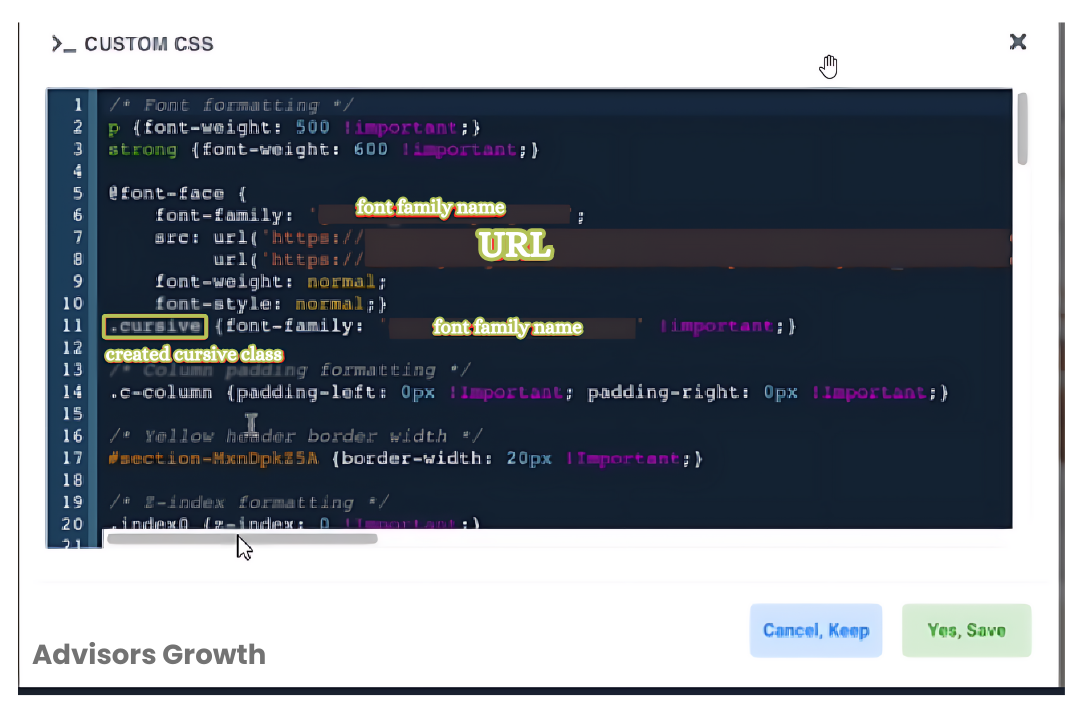
If you have the expertise, using custom CSS allows for advanced customization of your funnel or website beyond standard options. CSS (Cascading Style Sheets) is widely used to create visually engaging web pages by defining styles for layout, colors, and fonts.
Note: You might need to reach out to a developer for assistance if you lack the expertise.
Method 1: Add Code
Edit the Funnel: Navigate to the funnel builder and edit the funnel.
Add Tracking Code: Click on Settings > Tracking code and use custom code similar to the method shown below.
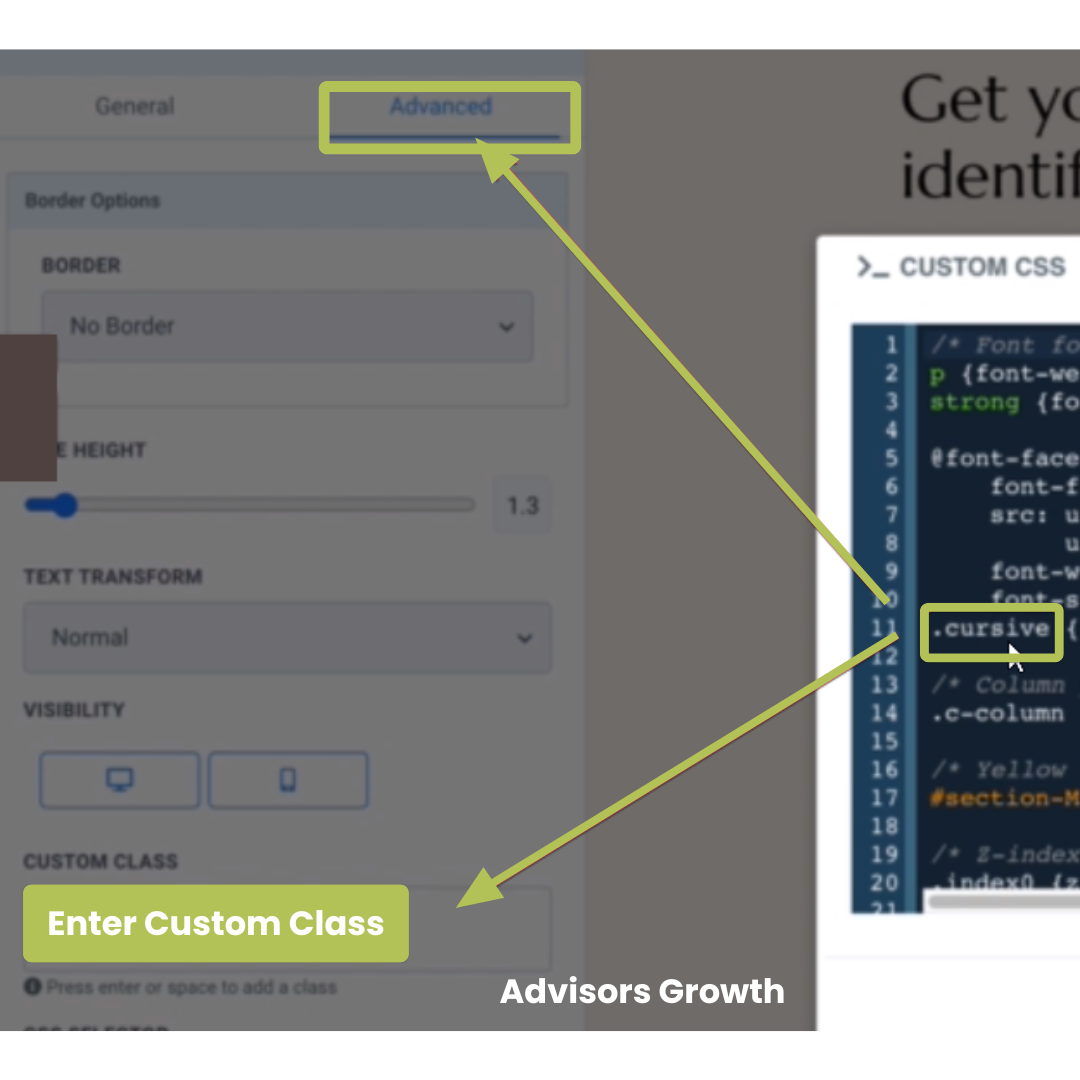

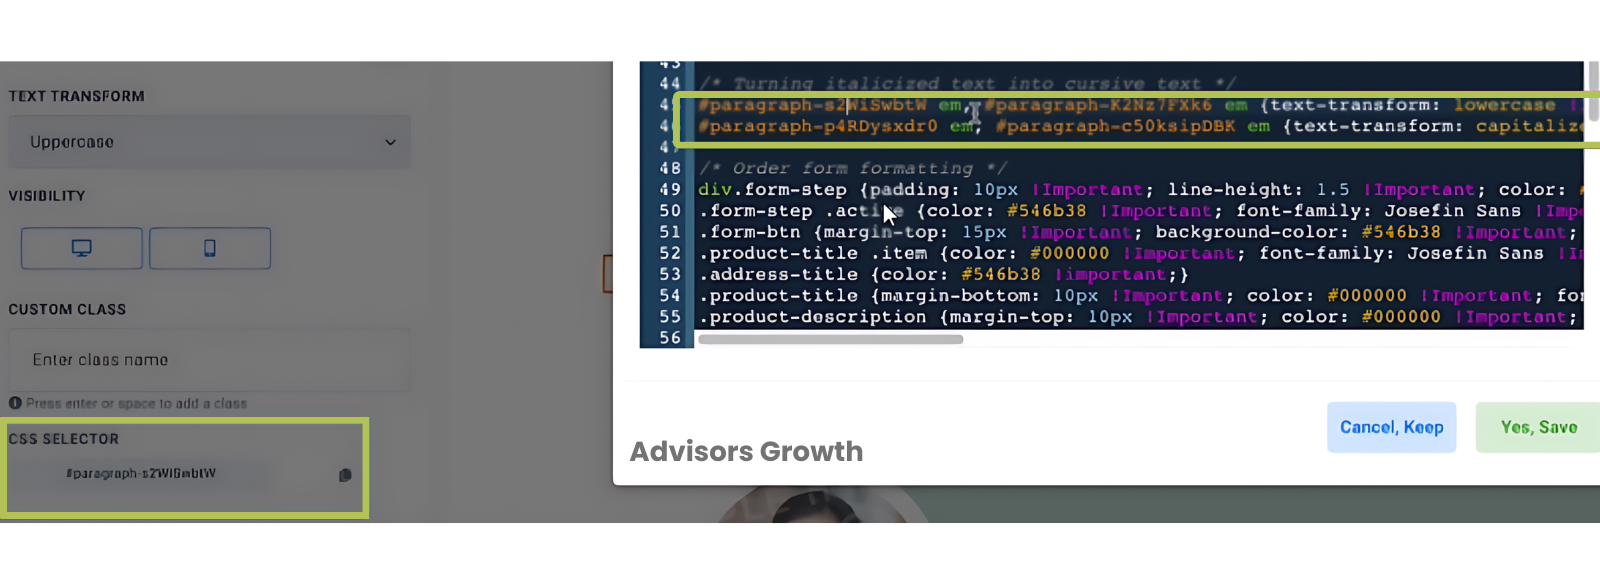
Method 2: Using the CSS Selector
You can uniquely modify a specific element by using the CSS selector.
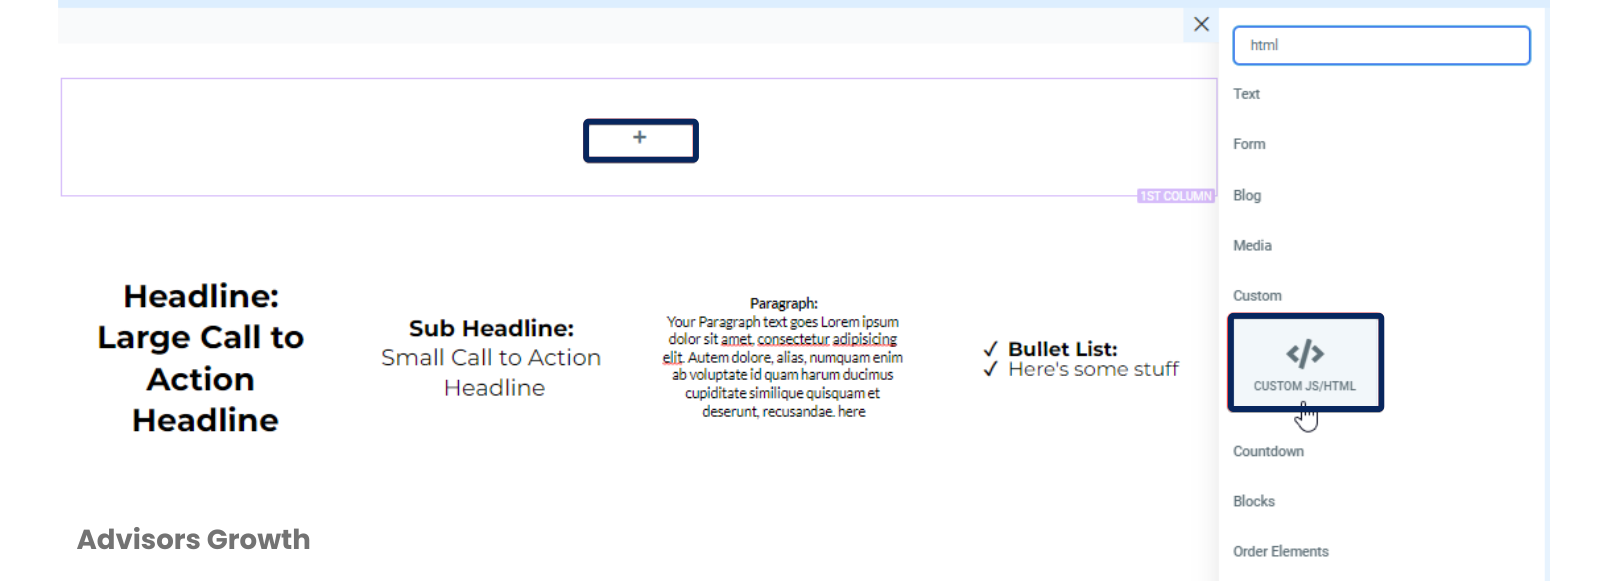
Method 3: Importing with CSS/HTML
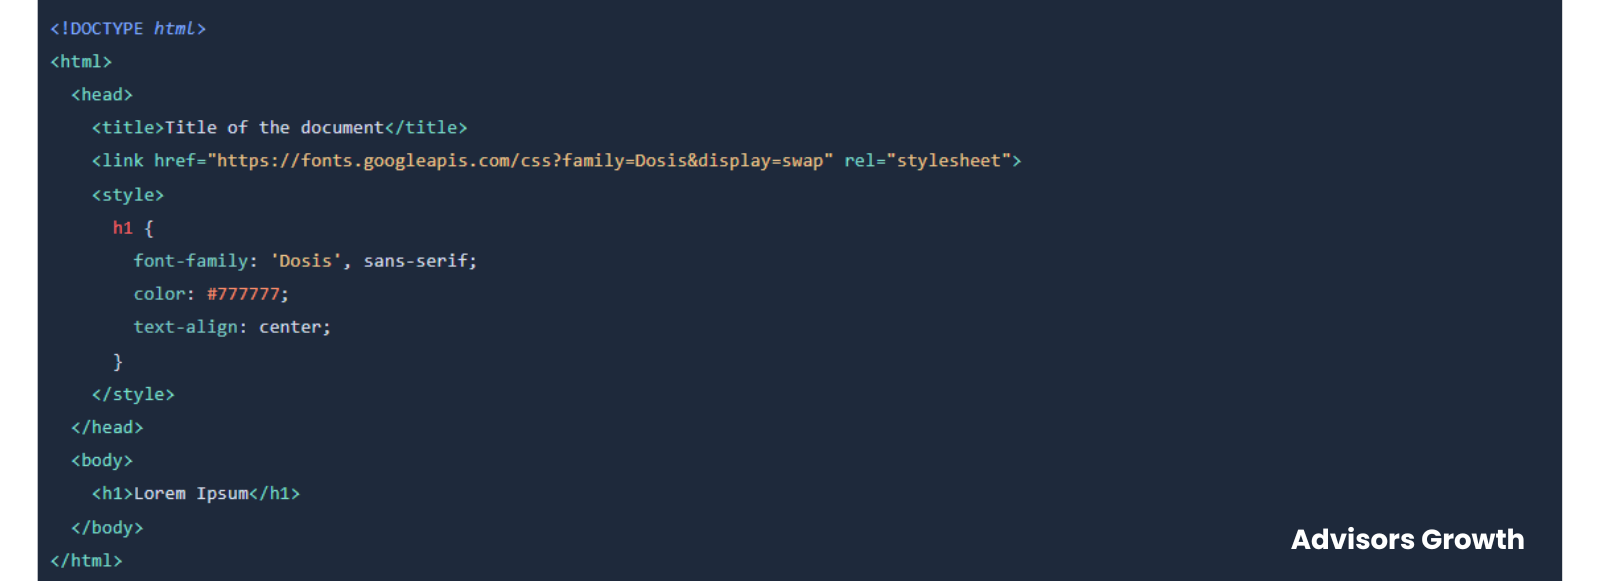
You can use either the CSS @import rule or the HTML <link> tag to import custom fonts.
To use HTML in the Site Builder, utilize the HTML element.
First, we'll explain how to import the font you want. Google Fonts can generate the code automatically based on the font you wish to add to your webpage. Follow these steps:
Select a Font: Open Google Fonts, find the font you want, and click it (a card with the font). Then, click "+ Select this style."
Embed the Font: On the right side, you'll see a container labeled "Selected family." Click "Embed" and choose either <link> or @import depending on where you need to add the font (in HTML or CSS).
Copy/Paste the Codes: Copy and paste the codes you need.


Example: Import the “Muli” and “Quicksand” Google Fonts for the <body> and <h1>, respectively. Specify the font-family for each element and style them using properties like color, font-weight, font-style, font-size, line-height, letter-spacing, and other properties.
It is also possible to import Google Fonts using the HTML <link> tag. You must add it to the header.
Use <h1> as a heading tag and write content in a <p> tag.